
One of the largest challenges to marketers, creators, and businesses is creating content consistently. When it comes to posts on social media or a promotional video, the process can be overwhelming and laborious. That is why increasing numbers of people resort to CapCut Desktop Video Editor, which is a powerful software, making the editing process simpler, and also incorporates the newest AI to save time and increase creativity.
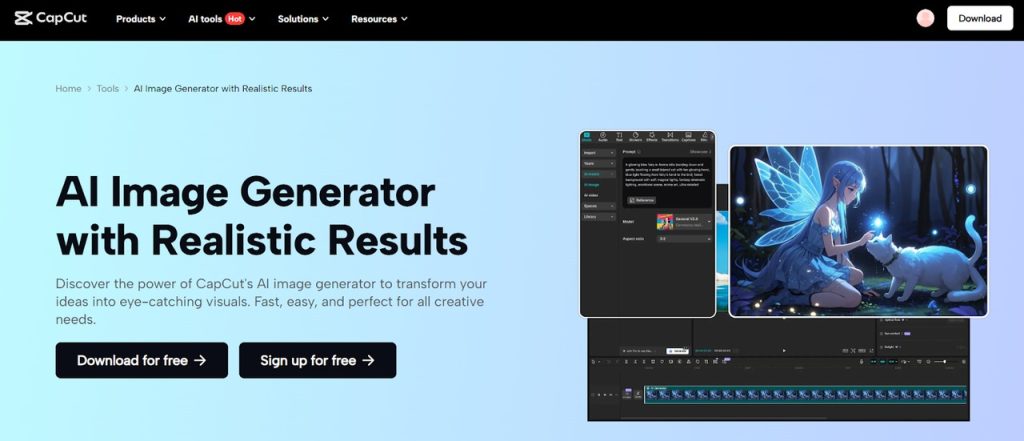
The AI image generator is an image generator among many others that has truly changed the world of content production. All needed is a few typed prompts, and you can immediately produce some personalized visuals based on your project. Toss in the ability to create an AI avatar with CapCut, and you have everything you require to streamline the creation of content without any need to spend a lot of money on state-of-the-art design tools.
Why CapCut is Perfect for Modern Content Creators
Today, more than ever before, content creators have been subjected to pressure to produce high-quality content at higher rates. CapCut can do so by providing:
- AI-powered creativity – Free personalized images within seconds with the AI image generator.
- Human-like characters – Your AI avatars will help you make your content relatable and engaging.
- All-in-one workspace – Import, edit, design, and export without changes in tools.
- Easy learning curve – Simple interface that does not restrict power.
- Professional exports – Create material in HD or 4K across platforms.
CapCut is not only a video editor, but also a full-fledged creative companion. Now we are going to take it step by step and create content with it.
Step-by-Step: Creating Content in CapCut Desktop
You can make a video about something explainable, run a marketing campaign, or simply show a product. CapCut has a simple workflow. The following is how you can move easily from start to finish.
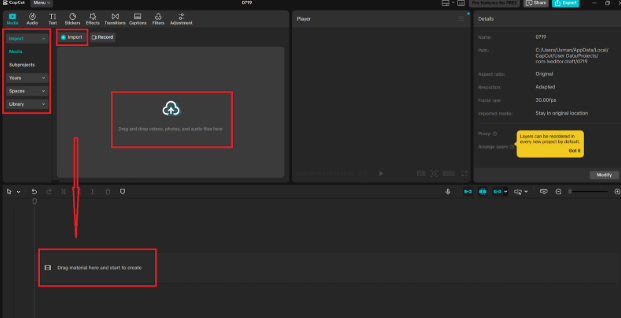
Step 1: Launch CapCut and Start a Project
Open CapCut Desktop and select the option of New project. As you jump to the primary editing workplace, you can also drag into the Media panel anything you might need access to, e.g., any type of branding, i.e., a logo or a background image, or any already existing footage.
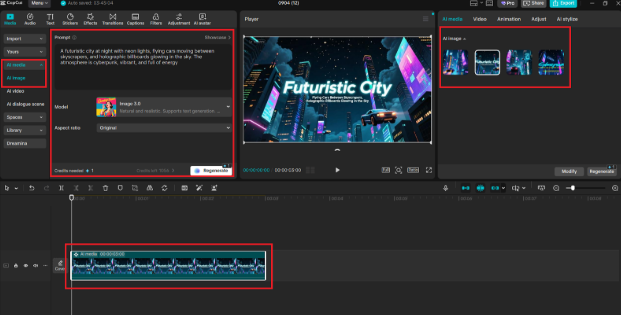
Step 2: Generate Visuals with AI Image Generator
On the left side, under the AI media menu, choose AI Image.. Get a short statement of what you want explained, like using a modern office background or having a product mockup on a white table. Once you have selected a style, click on generate. Those findings can be simply dropped onto your timeline to make your project a reality.
Step 3: Add an AI Avatar for Personalization
Then select AI Avatar in the AI Tools. Choose one or make one based on the style of your brand. Put the avatar in your feed where it becomes your guide on the screen or your presenter, and the content feels more approachable by the audience.
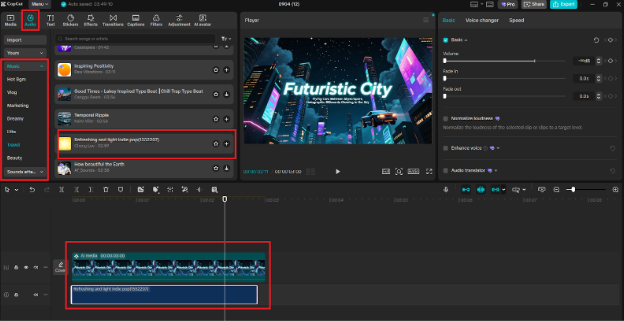
Step 4: Incorporate Audio and Effects
Click the Audio tab to browse the music and sound effects or record a narration. Move a track that you have selected into the timeline and match it to your images. The left toolbar also gives you an opportunity to add text overlays or stickers, as well as transitions to make the content look more entertaining and professional.
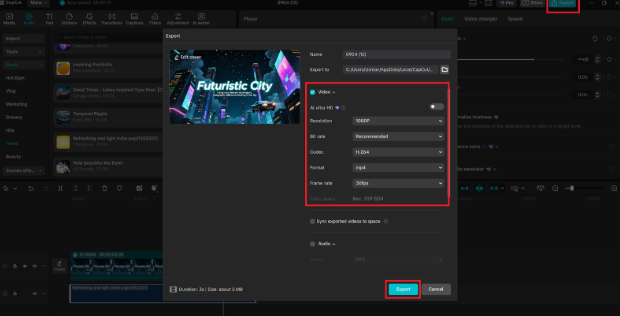
Step 5: Export the Finished Content
When all is in place, in the upper-right-hand corner, click the button that reads Export. Choose a resolution, format, and folder. Lastly, press repeat on the word export to produce your file that is to be uploaded to YouTube, Instagram, or any other platform you want.
Benefits of Streamlining Content with CapCut
The simplicity of the interface, paired with AI-based internal methods, allows creating content significantly quicker and easier than before with CapCut.
- Save time – AI enables you to create any visual immediately without needing to search stock libraries.
- Cut costs – As a beginner, you do not need to spend money buying various applications or design tools.
- Boost engagement – Data is interactive through avatars and audio.
- Consistency – Have a consistent visual image and image styles throughout your content.
- Professional finish – Export quality files to any format.
Tips to Maximize Your Workflow
Most of the tools in CapCut can be best appreciated by remembering the following tips:
- Prepend clear instructions on what the AI image generator should generate in the image to get the right results.
- Only use avatars to emphasize important parts of what you are saying.
- Use the same fonts and colors to present your brand identity.
- CapCut is not just a video editor for creators but an instrument for productive content that makes a significant difference for businesses.
- You can test variants of your video to see which ones have the strongest appeal to your audience.
Final Thoughts
Creation of content does not necessarily have to be time-consuming and difficult. The image generator available in CapCut Desktop lets you create images with the help of some AI. Videos can be customized with AI avatars, and you can complete your work with audio, effects, and professional exports.
With just five simple steps: launch a project, create visuals, create avatars, add sound, and export, you will create silk, ready to share content, composed of elegant barebones in minutes.
To both creators and businesses, CapCut is not merely a video editor but a vehicle for efficient content creation that has a significant impact.


Leave a Reply